I have now managed to shoot my second attempt at a coffee cup, as well as a model for this brief.

It took me a while to get back into the flow with working with Photoshop, but it came back to me eventually. I have decided to focus on the separately shot elements first before I work on comping any of the other elements in the background.
With the cup, it took me several attempts to use the pen tool to cut it out, but again, I got there eventually. In this case, though, the problem wasn’t so much the cutting out, it was the lighting conditions that the cup was shot using. The whole background image has a fairly flat light, with the overcast sky casting few shadows around any of the objects. Though they aren’t big, you can see on the cars that there aren’t any strong shadows at all. The inside of the cup would obviously be darker, however the outside surface wouldn’t have such a difference between the highlights and the shadows.
I used a 1×1 metre softbox to shoot this, with a white sheet of paper acting as a reflector. The reflector definitely helped brighten the shadows a little here, however, it was not enough. I had the softbox set about two metres away from the mug, which was placed on a black surface, although it would have been better if the softbox was on a lower power, and set closer to the mug so that the light wraps around the ceramic more.
The same applies to my model, though the more I look at the way he is standing in relation to the mug, I was shooting him from the wrong position. When I am able to reshoot, I will try to shoot the model from a higher angle.
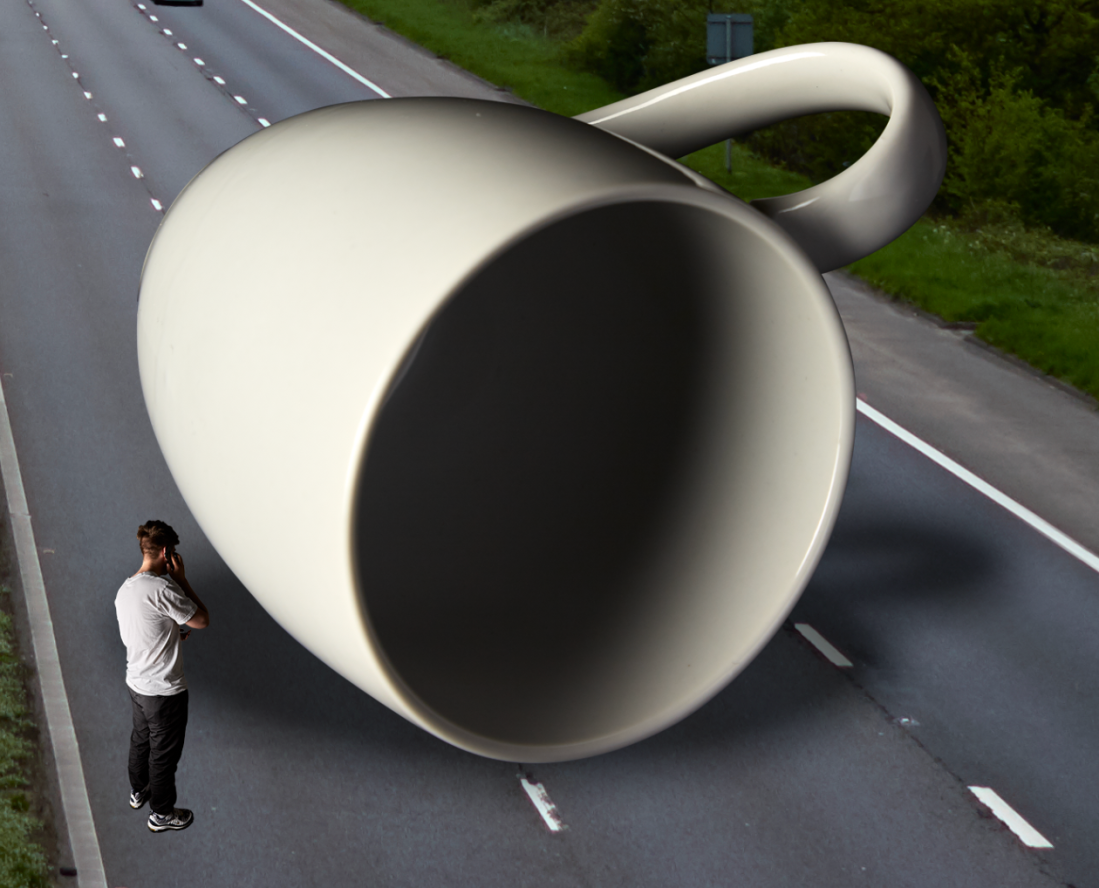
I was unsure about how I could create the drop shadow for the mug, and for the model. However, I watched a brief Youtube tutorial and figured out the rest for myself. I duplicated the layer, and dragged it down so it looked as though it was squashed. Using this layer, I made a selection in a new blank layer after hiding the squashed-mug-layer, and expanding it by 20 pixels, and feathering it by 30. I repeated this process, this time contracting it by 20 pixels, and feathering it by 10.
I have not added any ambient occlusion in this shadow, which prevents it from looking as realistic as it could be (at least, as realistic as a giant coffee cup on a motorway could get.) As well as this, as the sun was in the sky to the left of the image, I need to reduce how long the shadow is on the left-hand side of the mug, to create the effect of the shadow actually being cast.


In terms of art direction, I am still left slightly defeated as to what I could possibly do. I still plan on having some kind of traffic jam, but I was unsure as to how much of a tailback I would like to create, as well as how many people I want to have in the foreground as the first people at the scene. Thinking about it, and after discussing it, having just one person creates a different story to multiple people, as it looks as though the ‘landing’ has only just happened. Having multiple people in the shot would make it seem like there was much more confusion as to what had happened.
It was also suggested that I add cracks of some sort, either in the cup, the road, or in both. I don’t think this would work too well, and it’s not something I would like to try in this composite.
